
User Guidelines - Requests
Thee Requests Application in Sahana Eden can be used for managing requests for Items, People or General.
Requests
Requests can be made from any Site (Office, Warehouse, Hospital, Shelter, eg). Requests may include the following types of resources:
- Items (Consumables, eg. Food, Medical Supplies). See UserGuidelines/Supplies for details.
- People (Skills)
User can only make requests for sites which they have permissions for.
In future there are plans to also be able to request Assets.
Settings
There is a key decision as to whether to have a 2-step process with Commits or whether to simply Dispatch straight to Requests...the former is more suitable where there are many dispatch centers 'competing' to fulfill requests...the latter for when a dispatch center is the only place fulfilling (it's) Requests. The default is to use commits, to disable this:
settings.req.use_commit = False
Which request types are enabled is controlled via this setting:
settings.req.req_type = ("Stock", "People", "Other")
There are several other settings, but these are the key ones.
Request Status
Commit
This represents the commitments which have been to meet this request. This is simply a promise or a pledge and does not represent any action to meet the request.
This step is optional
Transit
This represents that resource have been sent (but have not yet arrived) to meet the request.
Fulfil
This represents that resource have arrived which meet the request. Once all of the resources in a request have been fulfilled, it can be considered to be closed.
Commitments
This allows sites to commit to meet request and track existing commitments.
Shipments of items to send can automatically be generated from commitments.
Example
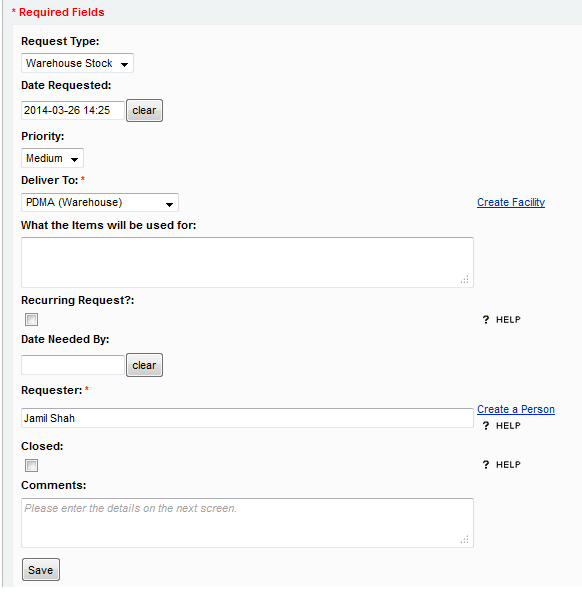
For example below is an image of the request form:

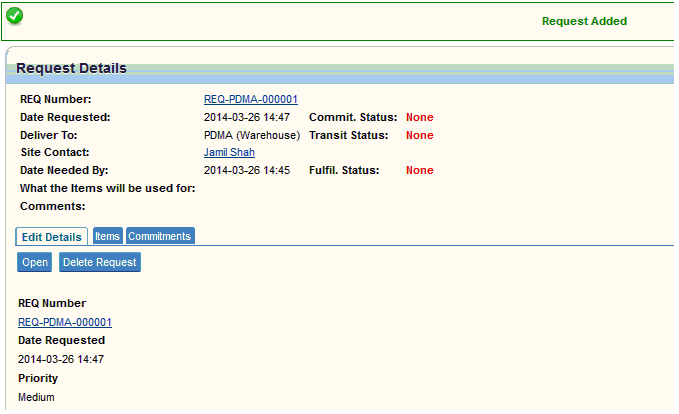
After completing all the required entries click on “Save” button at the bottom. You will be directed to the following screen.

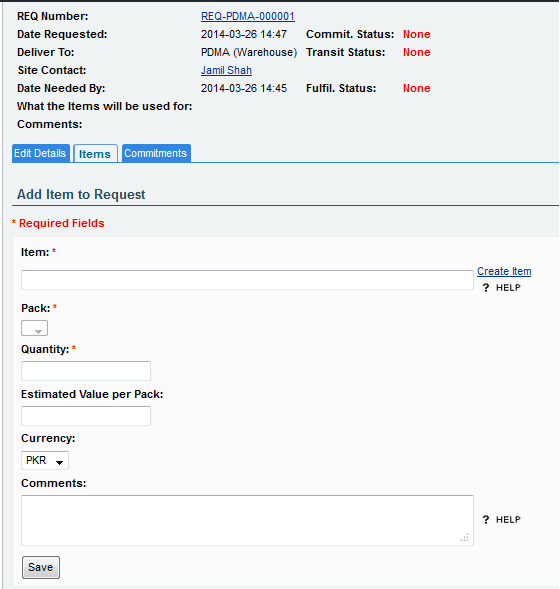
Now click on the “items tab” to add items requested and the required quantity as shown in the screen below:

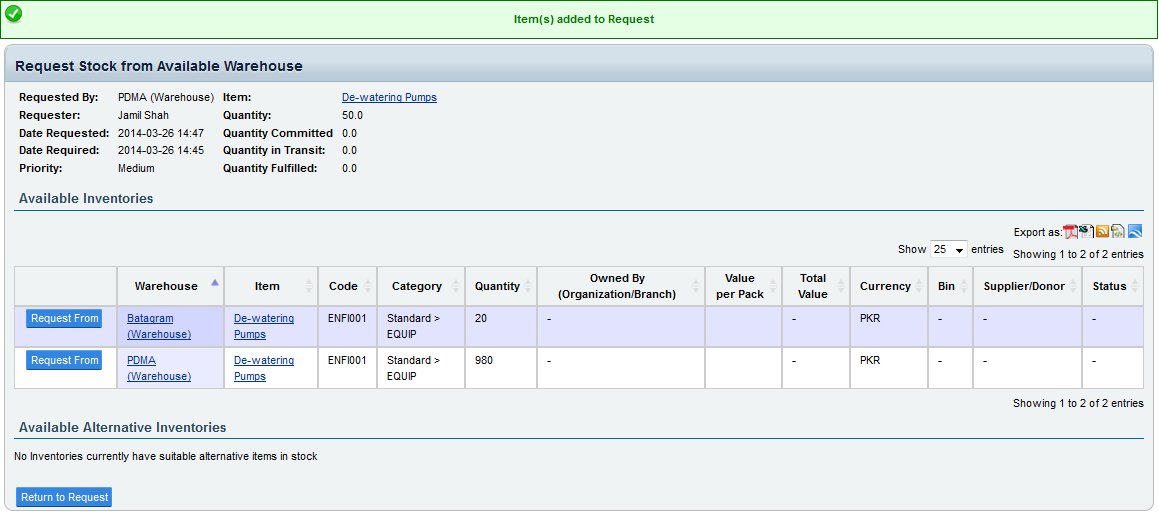
When you add an item, the system will inform you of the availability of the requested item in different warehouses where the requested item is available in stock. Here you can request the items from a particular warehouse based on your requirements, may be considering the distance, quantity available etc. as shown below:

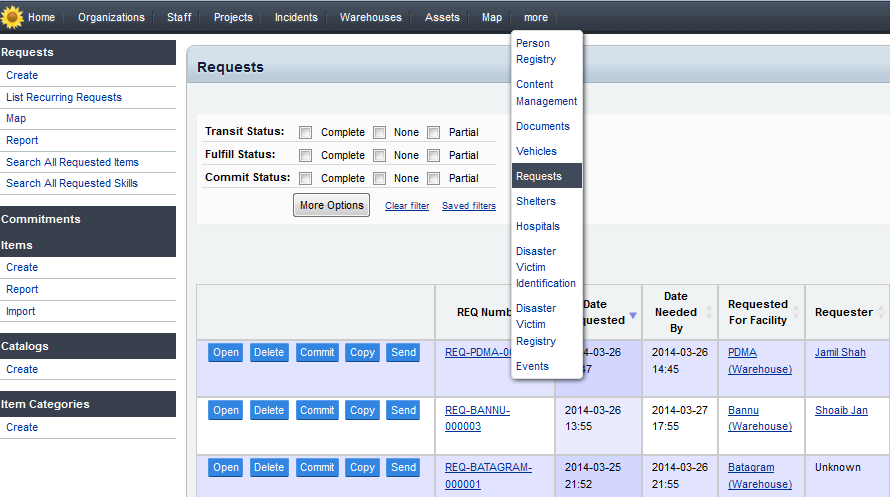
You can also click on the “Return to Request” button to add more items to your request. The request is now visible to all the warehouse/office/facilities. The request can be accessed from multiple locations:
- Click on More -> Requests -> Requests (Side menu) as shown below:

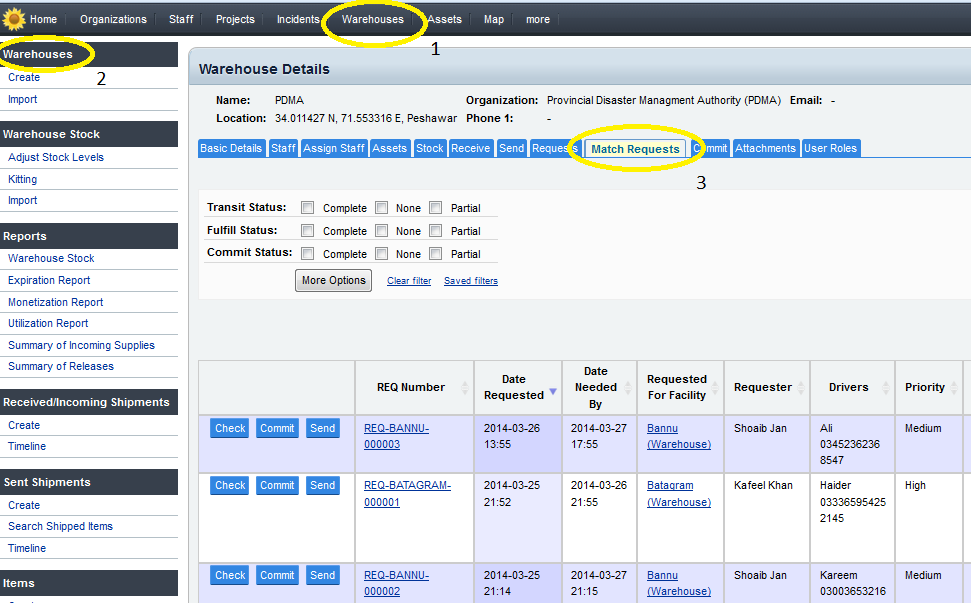
- Click on Warehouses -> Warehouses (Side menu) -> Open your warehouse -> click on “match requests” tab

Please note that “match request does not display your own requests” to search for your own request you have to click the “Requests” tab in your warehouse page.
Now when you have opened you warehouse page you can “commit” for a request if you have the items requested in your stock. This is only a commitment to inform all the stakeholders that you have committed to send the required items. This will change the commitment status of the request to complete.
You can also check which item is available in your stock and in what quantity. If an item is not committed by any other warehouse you can still commit a partial commitment.
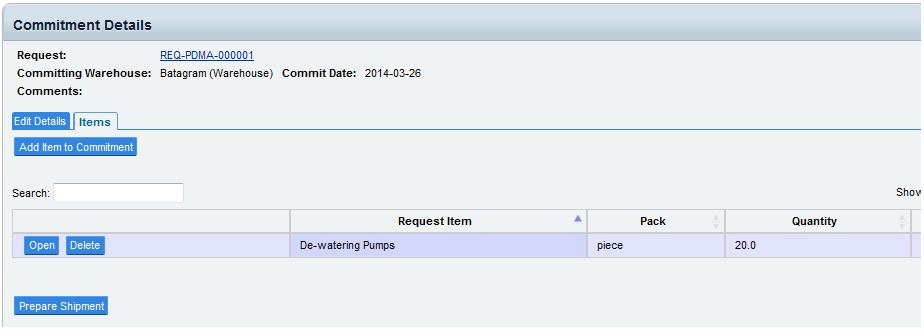
When you click on the “commit” button the following screen will be appear. You can open and specify the items and its quantity to include in your commitment. From this screen you also prepare the shipment to destination warehouse.

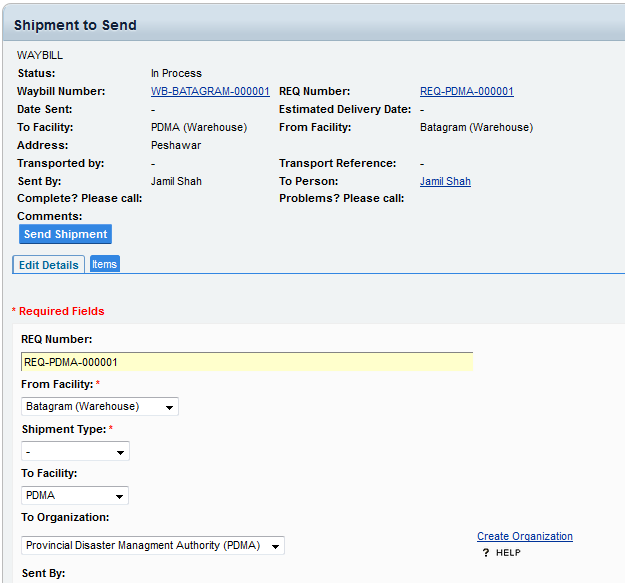
You also have the option to send items directly by clicking the “send” button.

Fill the form as per your requirements and click on “Send shipment” button to update the status of request to “in transit”.

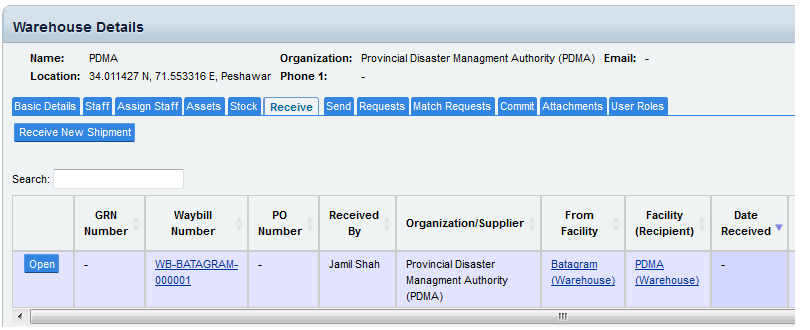
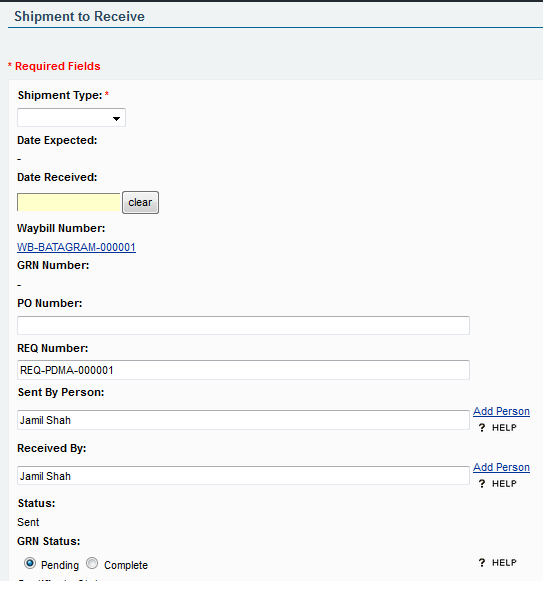
Now the requesting warehouse can see the “shipment” in the “Receive” tab of their warehouse.

Open the shipment, fill the form and click on save to save basic data. Now click on receive shipment button to complete the process.

The items sent will be deducted from the stock of sending warehouse and added to the stock of receiving warehouse.
See Also
- UserGuidelines/Tutorial/RequestAndInventory
- UserGuidelines
- UserGuidelines/Logistics
- UserGuidelines/Supplies
- UserGuidelines/Inventory
- BluePrint/Requests - Planned future functionality which is still under development
Attachments (11)
- Request-001.gif (68.3 KB ) - added by 11 years ago.
-
Request-001.png
(19.3 KB
) - added by 11 years ago.
Request-001
-
Request-002.png
(16.9 KB
) - added by 11 years ago.
Request saved and now add items
-
Request-003.png
(19.8 KB
) - added by 11 years ago.
Adding items to request
-
Request-004.png
(44.0 KB
) - added by 11 years ago.
required items availability in other warehouses
-
Request-005.png
(61.2 KB
) - added by 11 years ago.
Looking for available requests
-
Request-006.png
(73.0 KB
) - added by 11 years ago.
Search request
-
Request-007.png
(16.5 KB
) - added by 11 years ago.
commitment of items
-
Request-008.png
(32.1 KB
) - added by 11 years ago.
shipment screen
-
Request-010.png
(27.6 KB
) - added by 11 years ago.
Receive shipment
-
Request-011.png
(23.3 KB
) - added by 11 years ago.
final step
Download all attachments as: .zip
